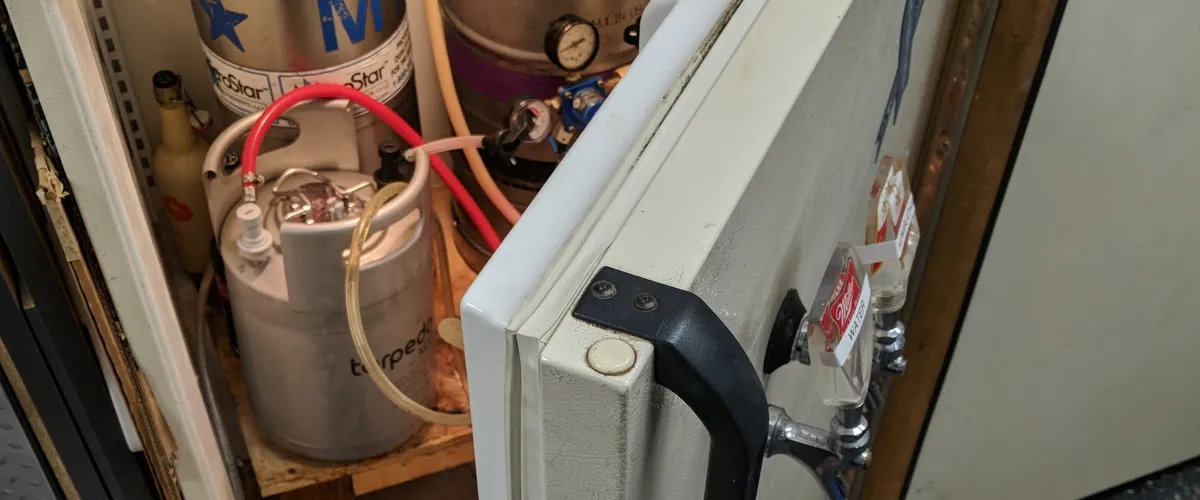
How to build a DIY sparkling water system at home
- Ryan Chichirico
- Diy
- 07 May, 2025
My family turned a commercial-style five-gallon keg into a home sparkling-water system for about $250. For our household, which goes through roughly one keg a week, it replaced about 25 cases of canned sparkling water in a year. It is a worthwhile project if you already have room for a kegerator or dedicated fridge and are comfortable working carefully with food-safe, pressurized CO₂ equipment.
Safety note: Follow the instructions for your tank, regulator, keg, and coupler; make sure the keg is fully depressurized before working on it; and ask a qualified supplier or technician if anything about the equipment is unfamiliar.
Why did we build a sparkling-water system?
My family has been into sparkling water since the Perrier days, long before La Croix and Waterloo made it trendy. We rarely drink soda, so sparkling water is our go-to for that fizzy fix. Over time, the stacks of Costco boxes and aluminum cans piling up in our recycling bins started to wear on us and we knew there had to be a better way.
Pre-children, we used to enjoy brewing our own beer so over the years we built up a collection of brewing equipment, including a kegerator and keg equipment. So I thought to myself: Why not repurpose that into a sparkling water system? In this article, we’ll talk about how to take a regular beer keg, the kind you buy at a liquor store and not a corney keg, and make it into a sparkling water storage tank. No more cans and no more expensive CO2 refills for that SodaStream.
What did our setup cost and save?
| What we measured | Our experience |
|---|---|
| Initial setup cost | About $250 |
| Break-even point | About 25 cases of sparkling water |
| Typical household use | One five-gallon keg ever 1 - 2 weeks |
| Main non-financial benefit | Far fewer cans and packaging to recycle. There’s also a cool factor to having one |
Your numbers will depend on local sparkling-water prices, what equipment you already own, and how much your household drinks. For us, the convenience and reduced packaging mattered as much as the break-even math.
What parts did we use?
-
Kegerator or Fridge Setup. Find a used one on Craigslist or Facebook Marketplace
-
5 Gallon Sankey D Keg (Commercial-style keg). Note: I bought one from the local beer store, drank the beer first, depressurized and cleaned it. Do this at your own risk!
-
CO2 Tank (5 lb is ideal, especially for moving it around). You can find these at many liquor stores or welding supply shops. I get mine refilled at General Air Service & Supply.
-
Food-Grade Beverage Tubing. Make sure you size yours to fit your couplers.
Want to go the “all in” approach?
Check out this kit you can buy for $210
How did we build the sparkling-water system?
-
Clean and sanitize everything
Even though you’re just using water, cleanliness is key. Run a sanitizer like Star San through the keg and tubing before your first use. The cheaper route is to use bleach but make sure you rinse it thoroughly! Make sure you clean the keg and the food grade lines.
-
Chill your water first (if possible)
Cold water carbonates more efficiently. If you have space in your fridge, you can keep a second full keg chilled and simply tap it when you’re ready.
-
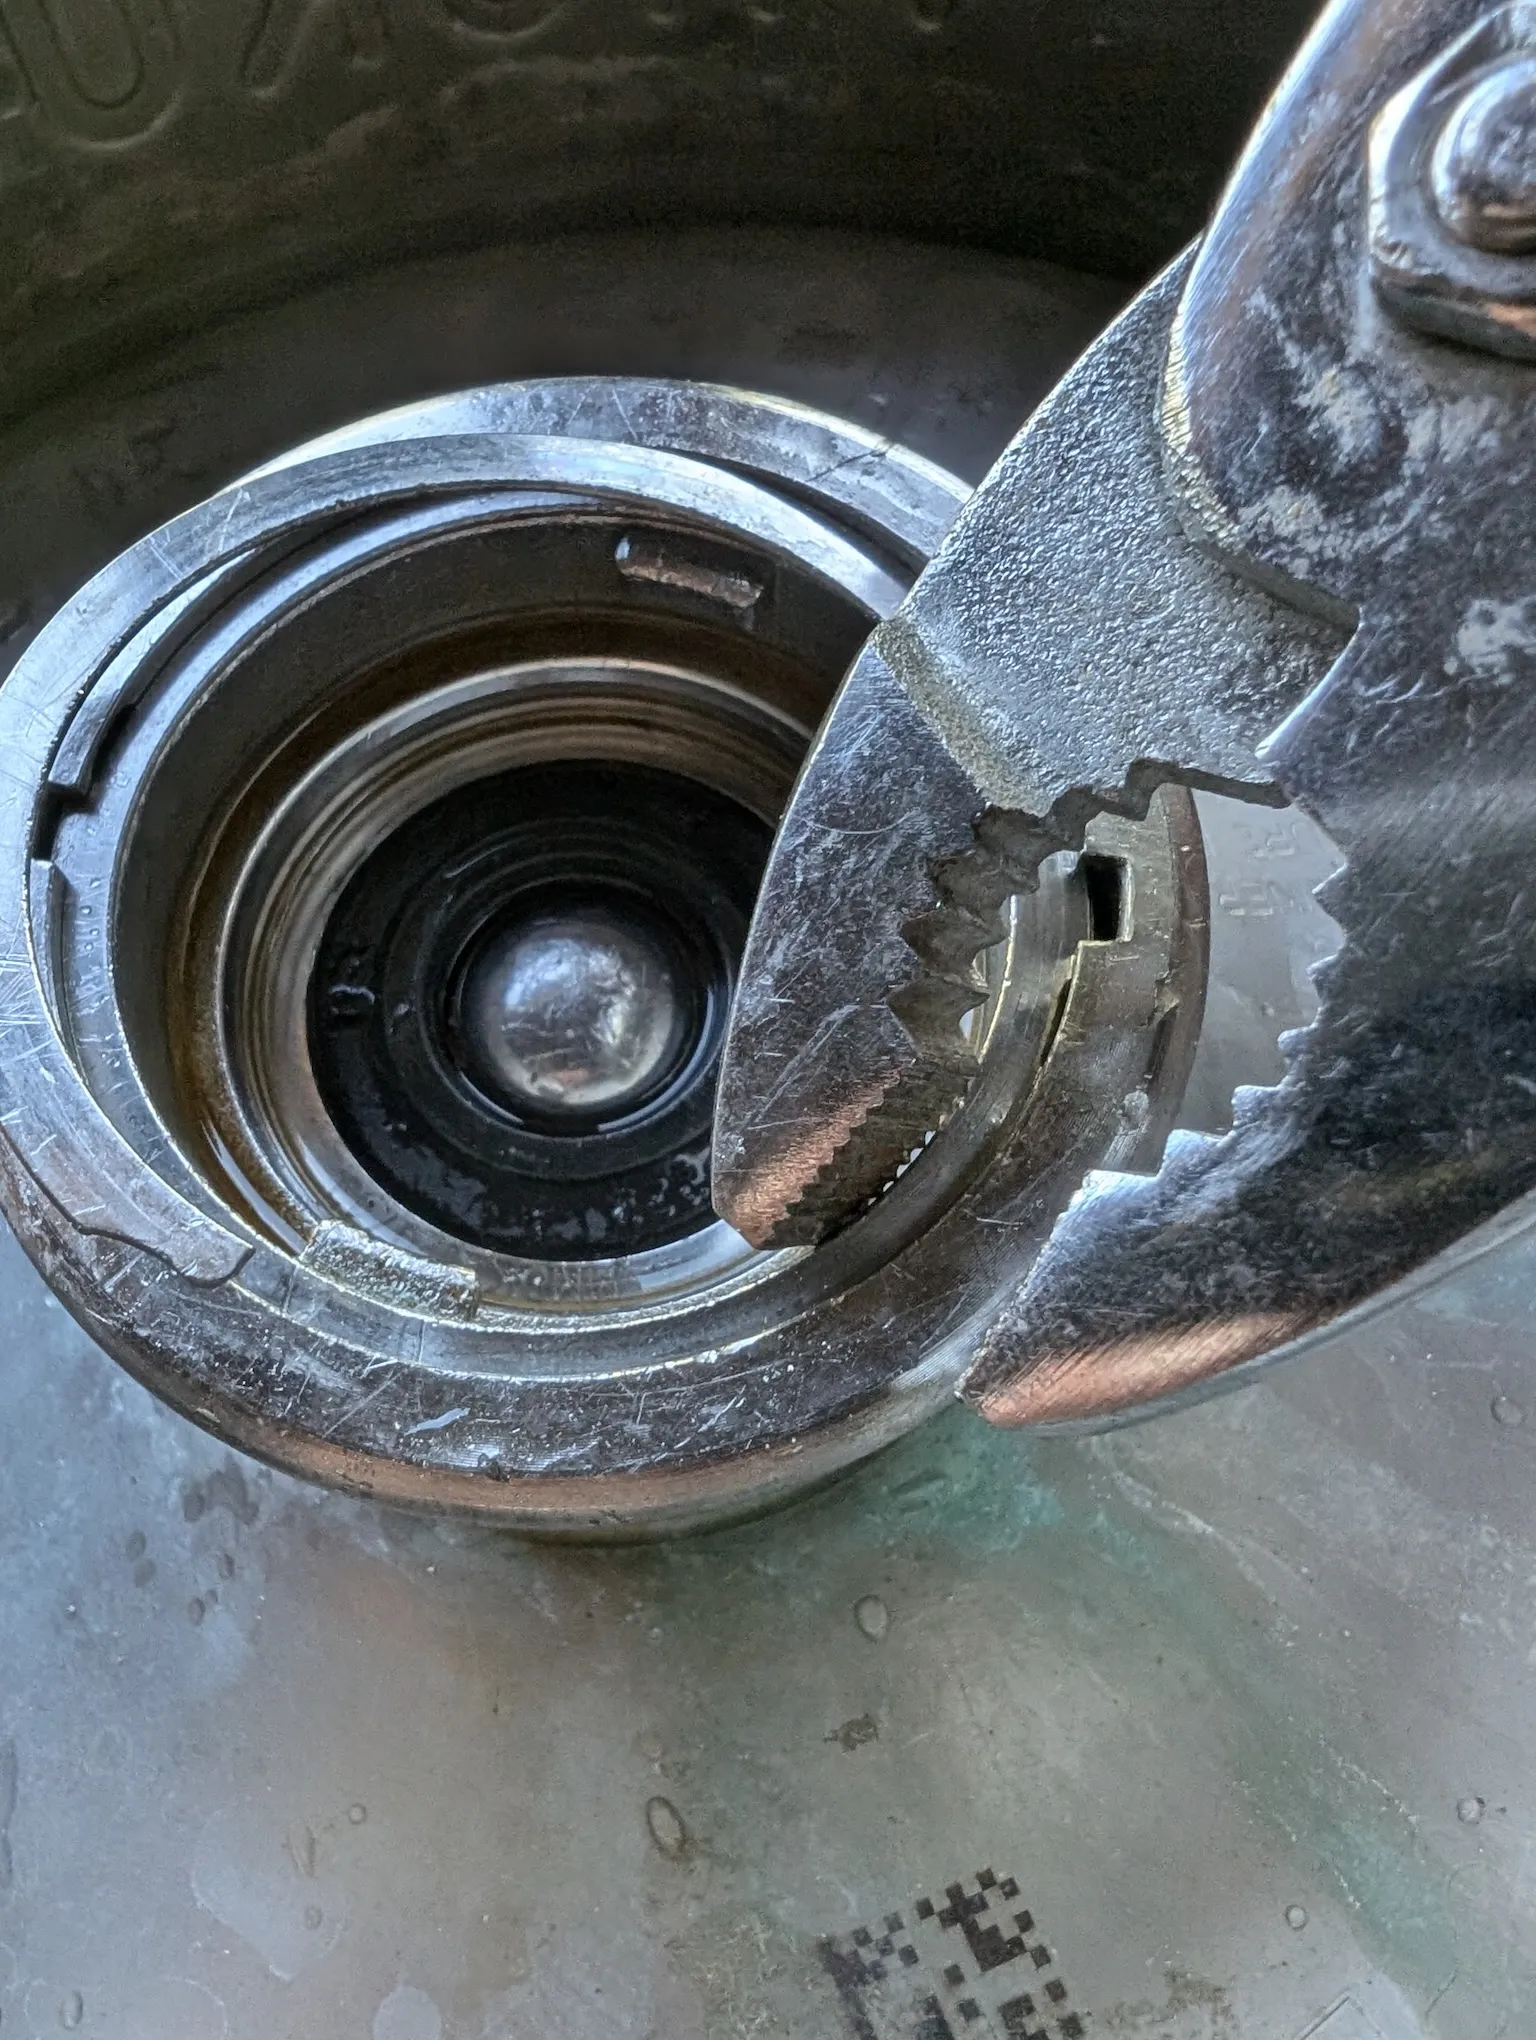
Remove the lock ring and neck
This is the trickiest part of the whole set up. If you’re using a Sankey D Keg (commercial grade) like I mentioned above, there’s a small ring that locks the neck into place.
-
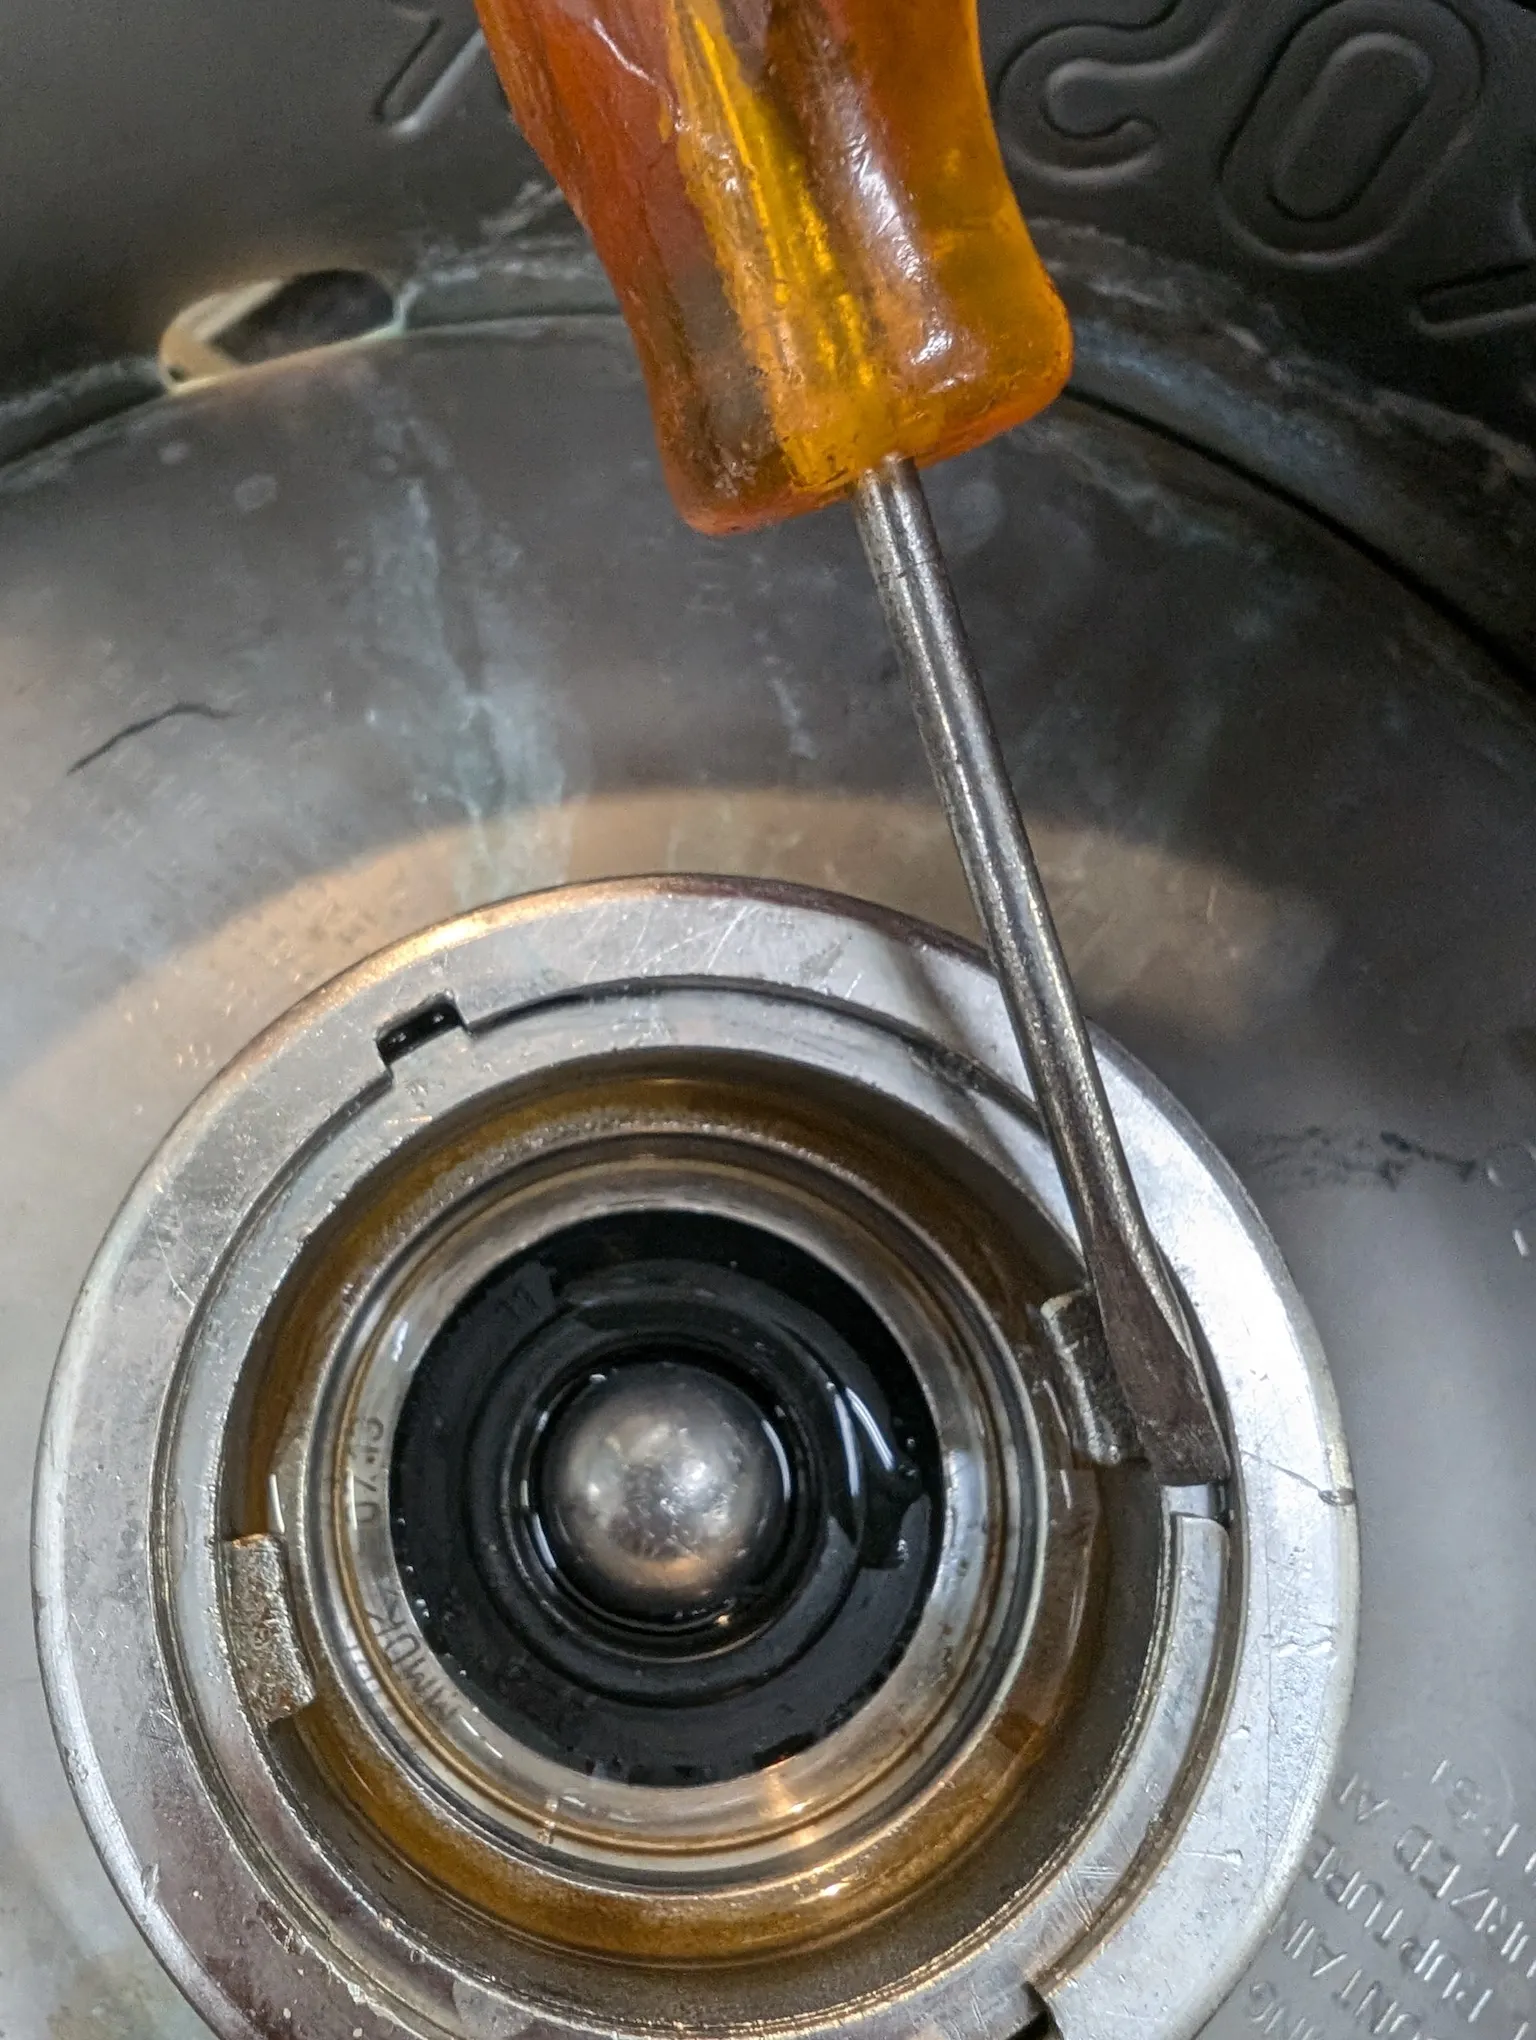
Make sure the keg is depressurized! While the coupler is still connected, either open the handle completely or pull the small release ring on the side of the coupler. After disconnecting it, I pushed down on the ball with a small screwdriver to double-check there’s nothing left.
-
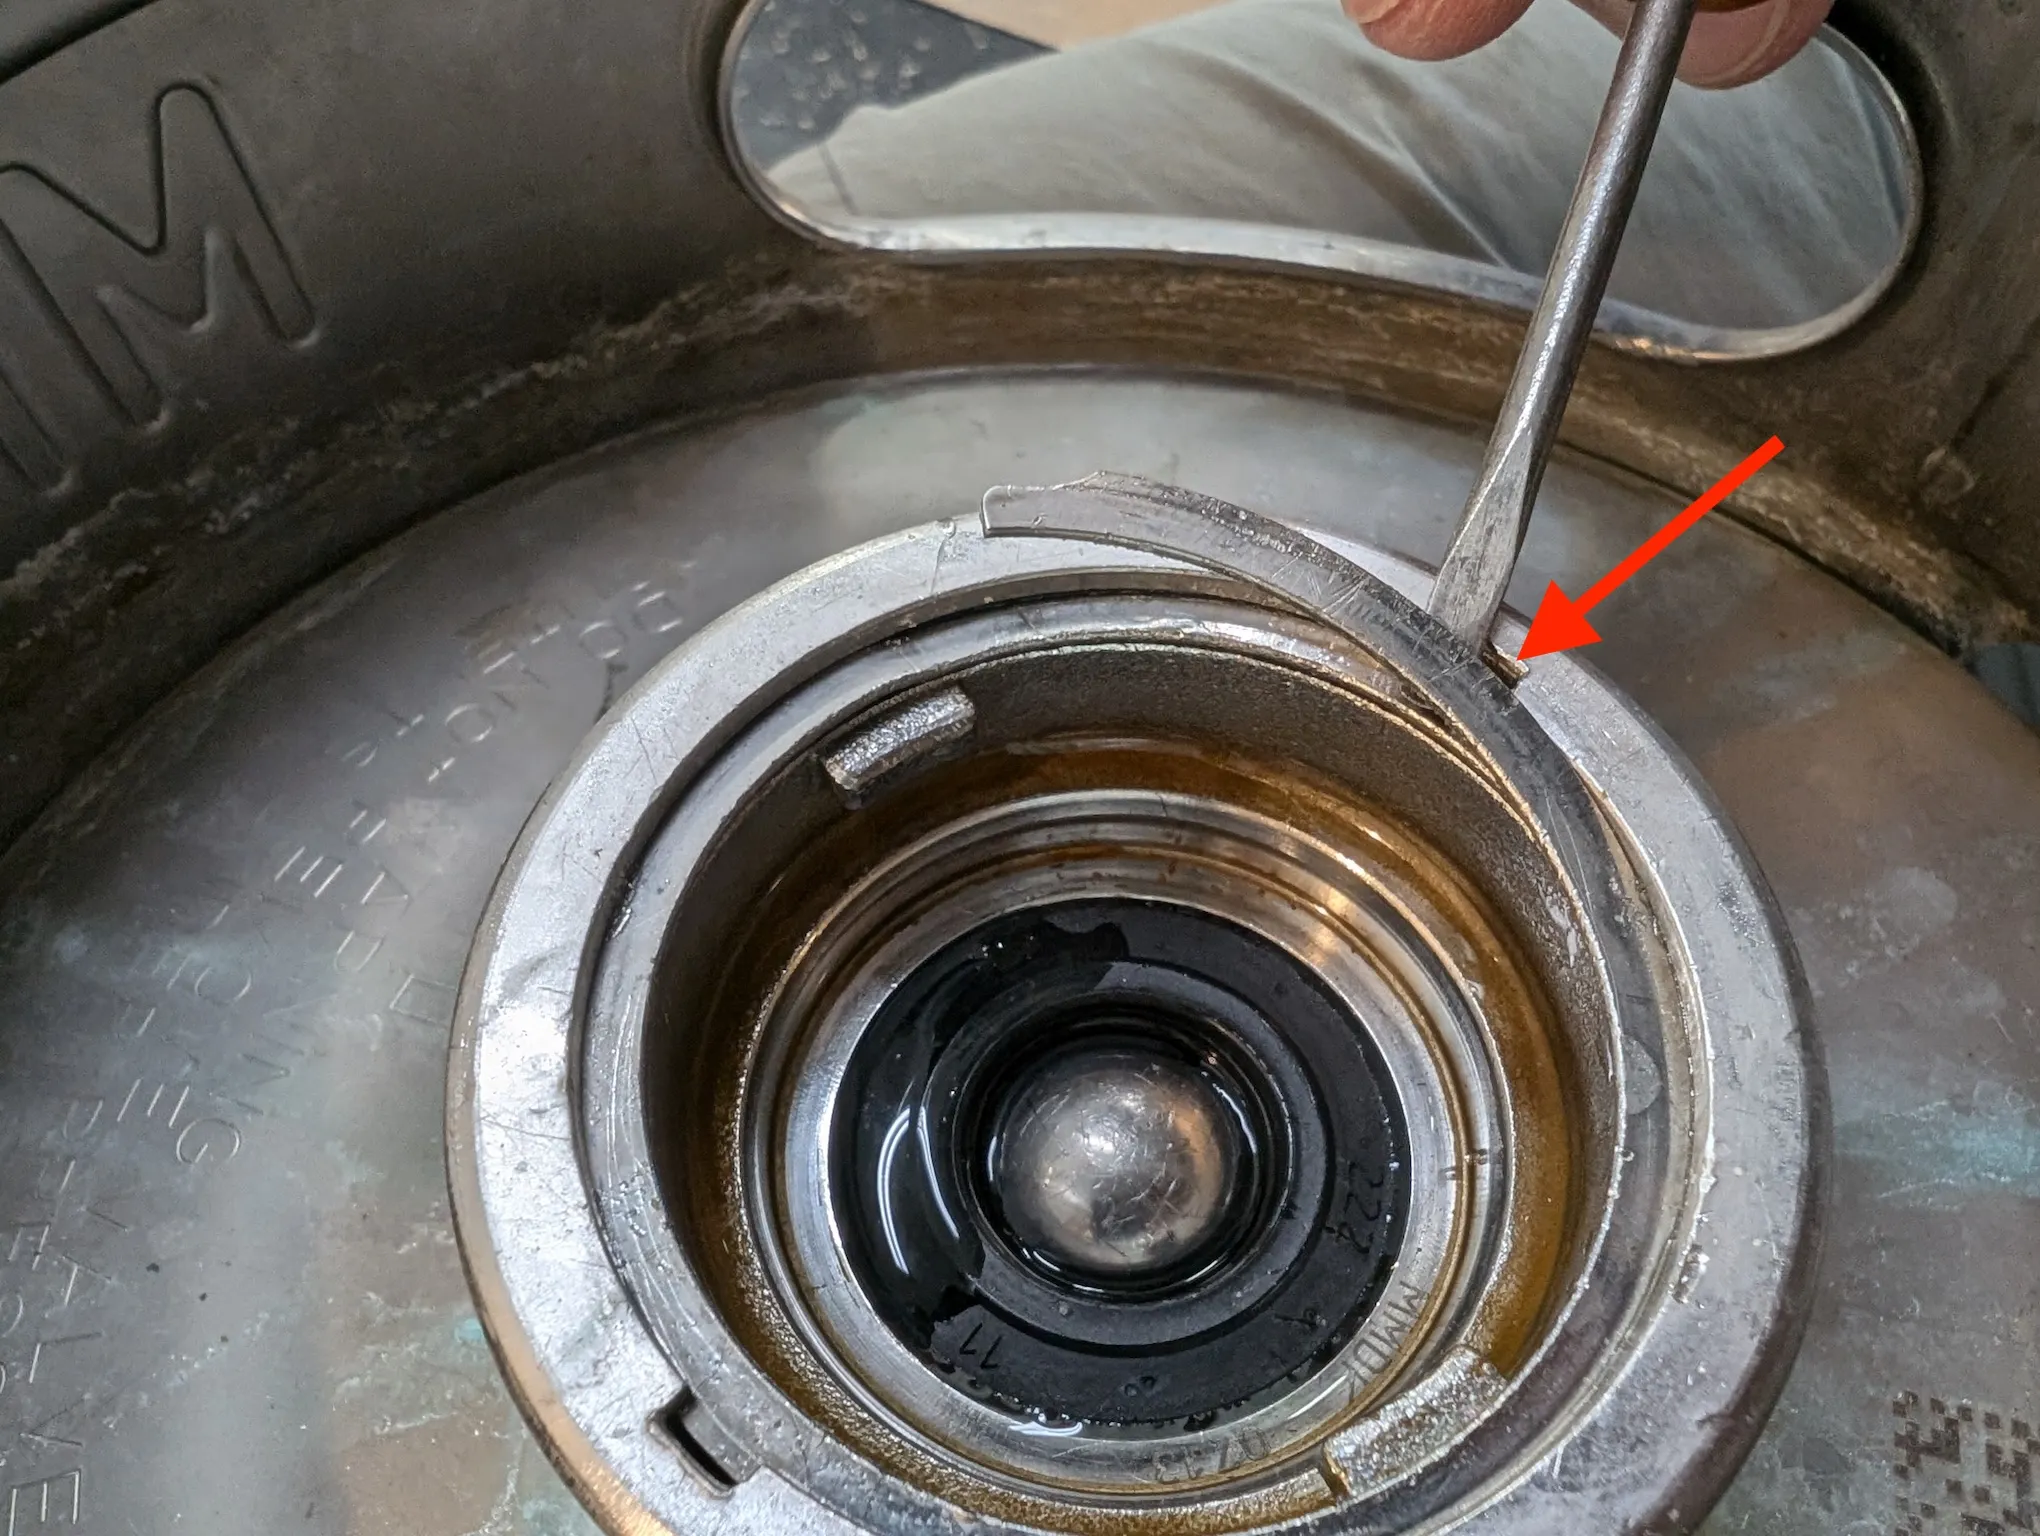
There are 2 small holes on the neck that you can put a screw driver in. What you’re looking for is the end of the lock ring and you slowly want to pry the end of the ring out. You may need to lightly tap the end to shift it towards the opening. Sometimes grabbing it with a pair of pliers helps.
-
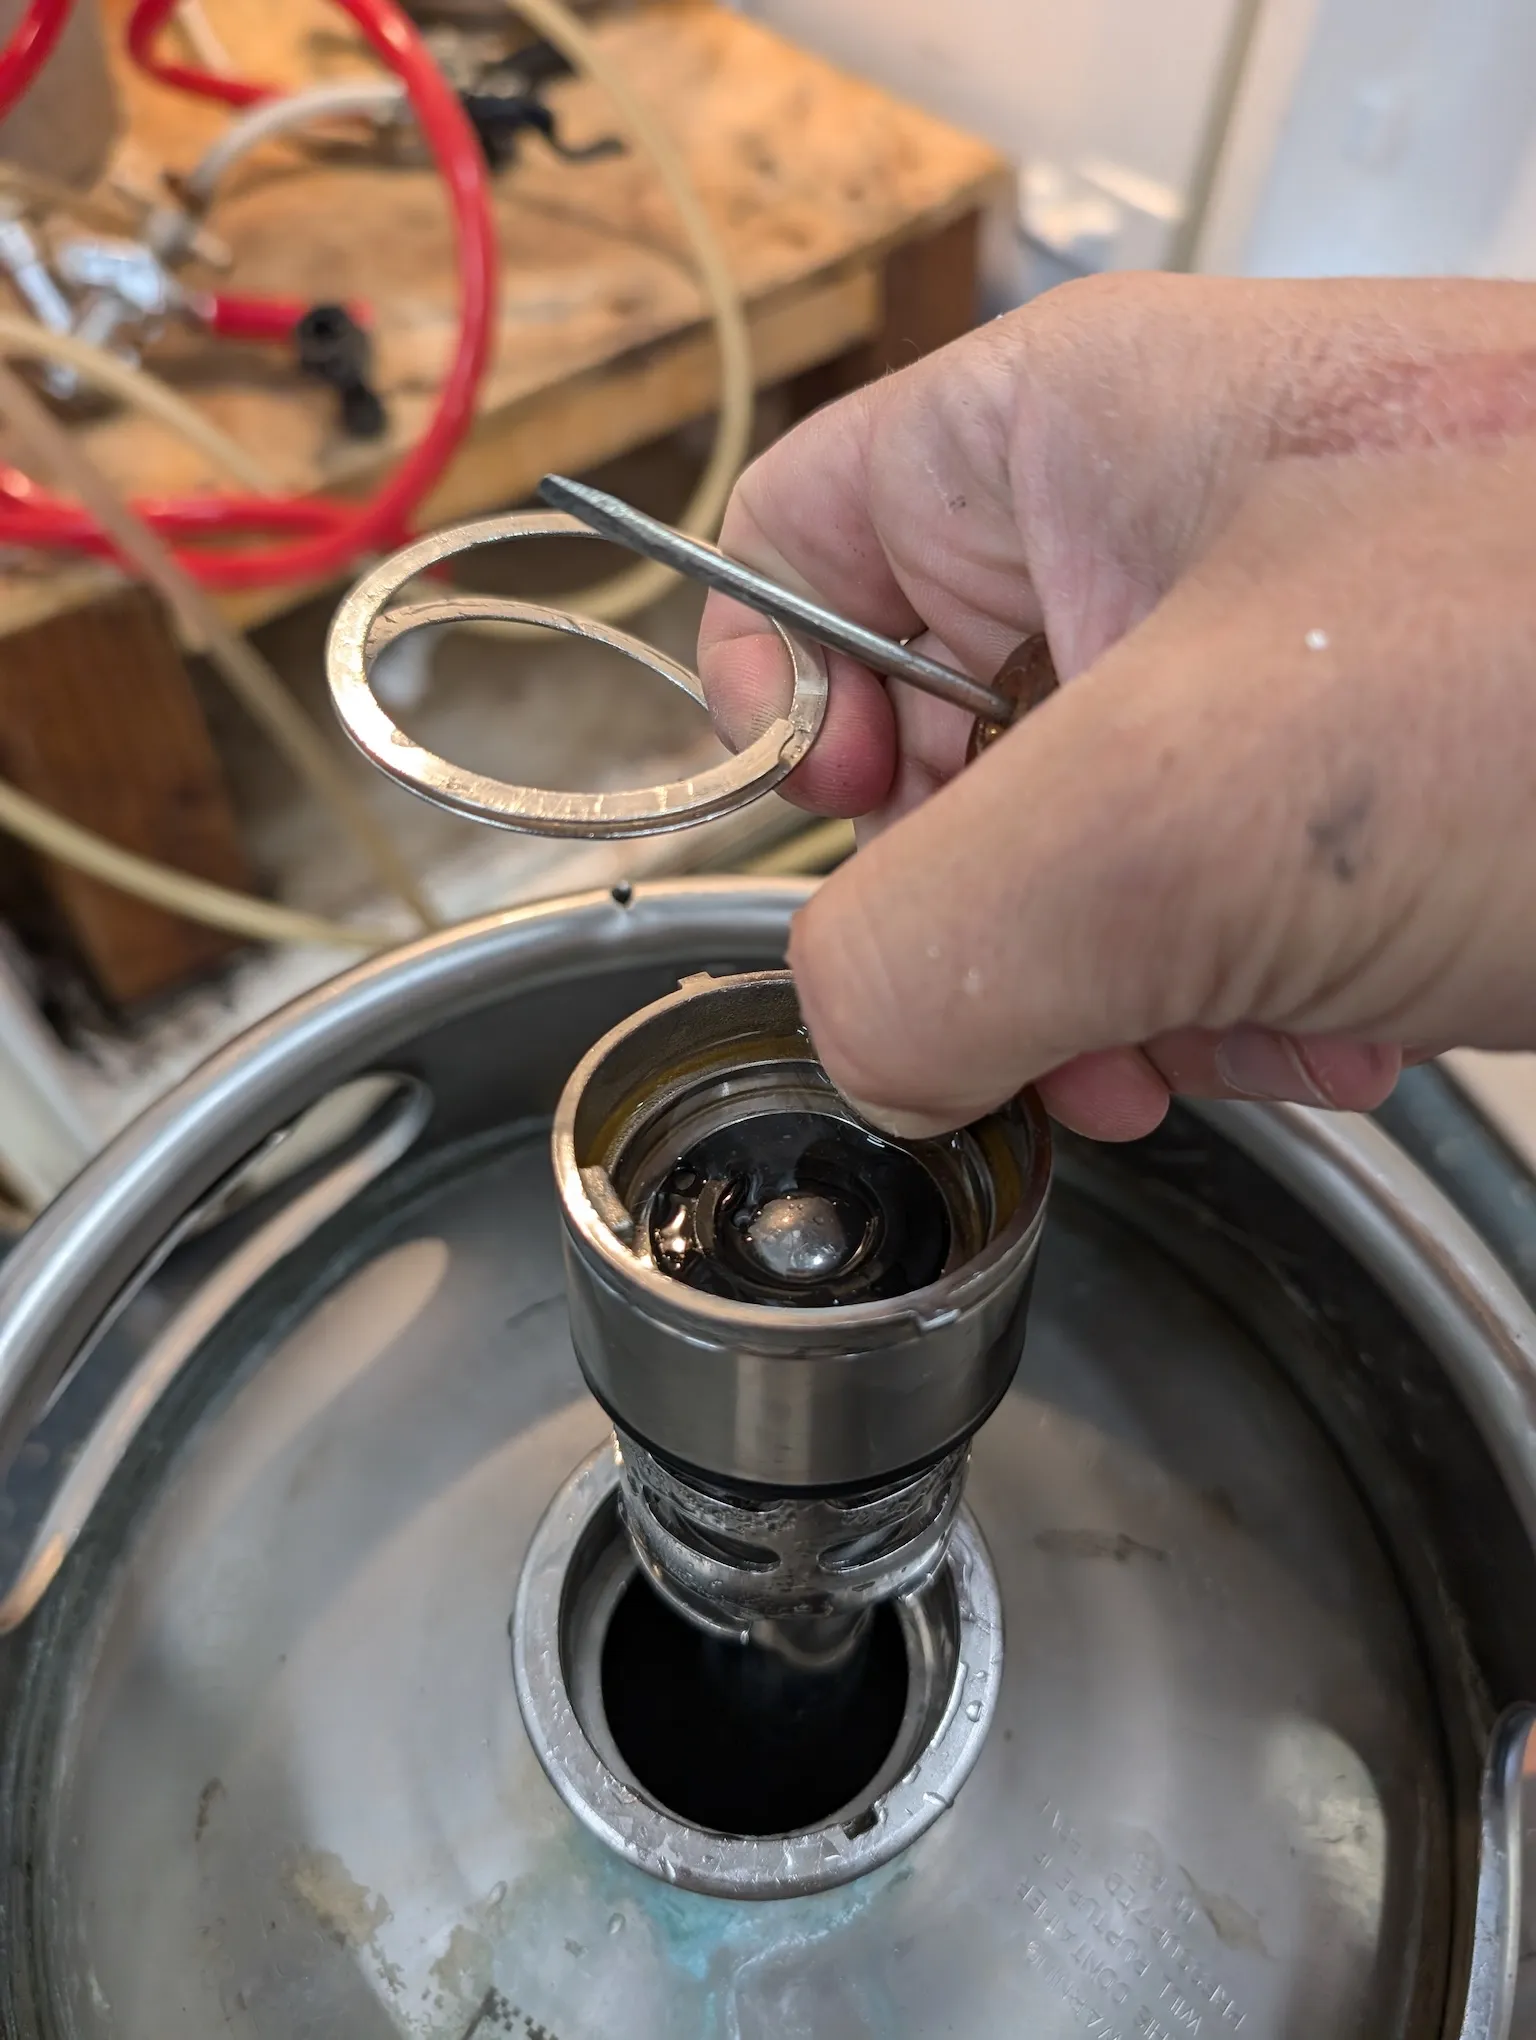
Slowly pry the ring out. Twist the neck and lift it straight out. Avoid putting your face right over the neck just in case there’s any pressure left.
-
Finally, remove the neck.
-
-
Fill the keg Fill the keg to almost full. Leave some room at the top since the neck will displace some water and you want to have some room left over for the CO2 gas to fill.
-
Replace the neck and lock ring Reverse the steps from step 3. It helps to have a pair of pliers to slowly press the lock ring. Work your way around the neck securing the lock ring in place. When I put the lock ring back into place, I try to position it so the end is close to the release holes so it’s easier to take out the next time I need to refill it.
-
Set up the CO₂ system
-
Connect your regulator to the CO2 tank.
-
Hook up the gas line to the D system coupler.
-
Attach the coupler to your keg (make sure it’s locked in place).
-
-
Carbonate the water
Set your regulator to around 30 PSI and leave it for 24–48 hours. Shake the keg a few times during this period to speed up absorption. Once it’s carbonated to your liking, dial the pressure down to 10–12 PSI for serving.
-
Enjoy it A fresh 5 gallon keg of sparkling water usually lasts our family about a week. Your mileage may vary.
What did we learn after using it?
-
Add citrus: Drop a slice of lemon or lime into your glass. Don’t put fruit in the keg.
-
Don’t have time for fresh fruit? Consider buying the flavor options in your local supermarket. Both SodaStream and Bubbly make small bottles to flavor your water. As an added bonus, you can also buy the Sodastream soda syrups and use those when you need that soda fix.
-
Try filtered or mineral water: Different water types give different taste profiles. I live in Colorado and I’ve found the tap water tastes just fine so that’s all I use.
-
Clean between fills: Even though it’s just water, always rinse and sanitize the keg between batches. I also frequently clean the fluid lines.
If you build a version of this system, keep notes on your actual costs and refill schedule. Hopefully this is a fun project for you and your family and maybe you’ll save some money and waste along the way!