Debugging Geometry - Installing a CIP1 Front Floor Pan in a 1970 VW Bus
Table of Contents
If you’re reading this, chances are you’re staring at a reproduction floor pan sitting almost where it should go, wondering why something that looks so simple feels so wrong.
That was me.
This post isn’t a how-to written by a master body tech. It’s a real-world account of installing a CIP1 front floor pan in a 1970 VW Bus Westfalia, written from the perspective of a DIY restorer who had to figure it out the hard way.
If this saves you even one “what did I just cut?” moment, it’s worth it.
Tools Required
- Angle Grinder
- Flap wheels
- Cutting discs
- Hammer & Dolly set
- Metal bending pliars (optional)
- Welder (I have a MIG)
The Setup
The bus:
- 1970 VW Bus (Bay Window)
- Original doglegs, a little surface rust
- Original inner valance
- Original front structure
The problem:
- Borderline Flinstone Mobile: Rusted front floor, holes in the floor, some hidden with additional metal laid over the existing floor from the previous owner
The replacement:
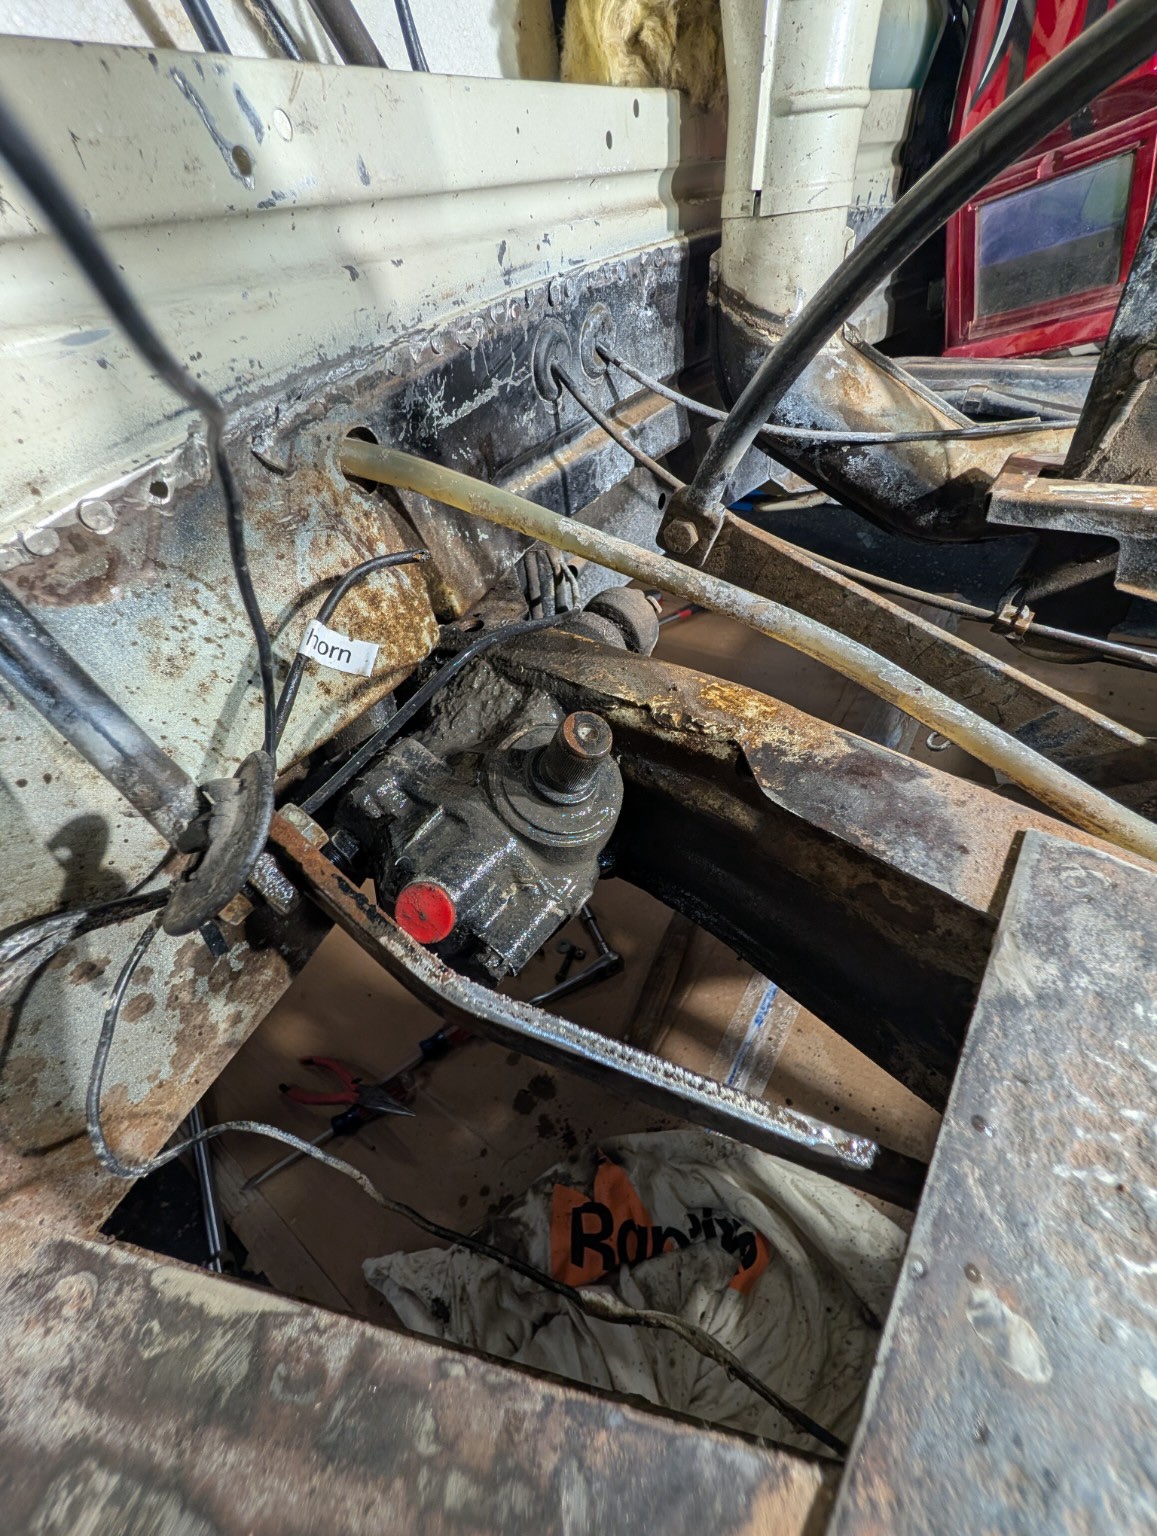
For a few days… well weeks really but a few hours per day, I attacked the floor removal. The old floor was removed by drilling spot welds, grinding spot welds, cutting out sections, and finally hammering and prying it out. I tried to be careful, but still I was aggressive enough that the surrounding metal definitely remembered my efforts.
At the time, I didn’t realize how important that (aggressive frustration) would become.
The First Reality Check
I did a bunch of research. It seemed like many VW enthusiast really liked the Klassicfab (“The Green Panel”). The reviews mentioned it was a factory replacement and good fitment. Unfortunately, they no longer made a floor pan for a 1970 so I was left to do more research. I searched and read and landed on the CIP1 floor pan. Out of the box, it was solid and generally the right shape. All the holes looked to line up.
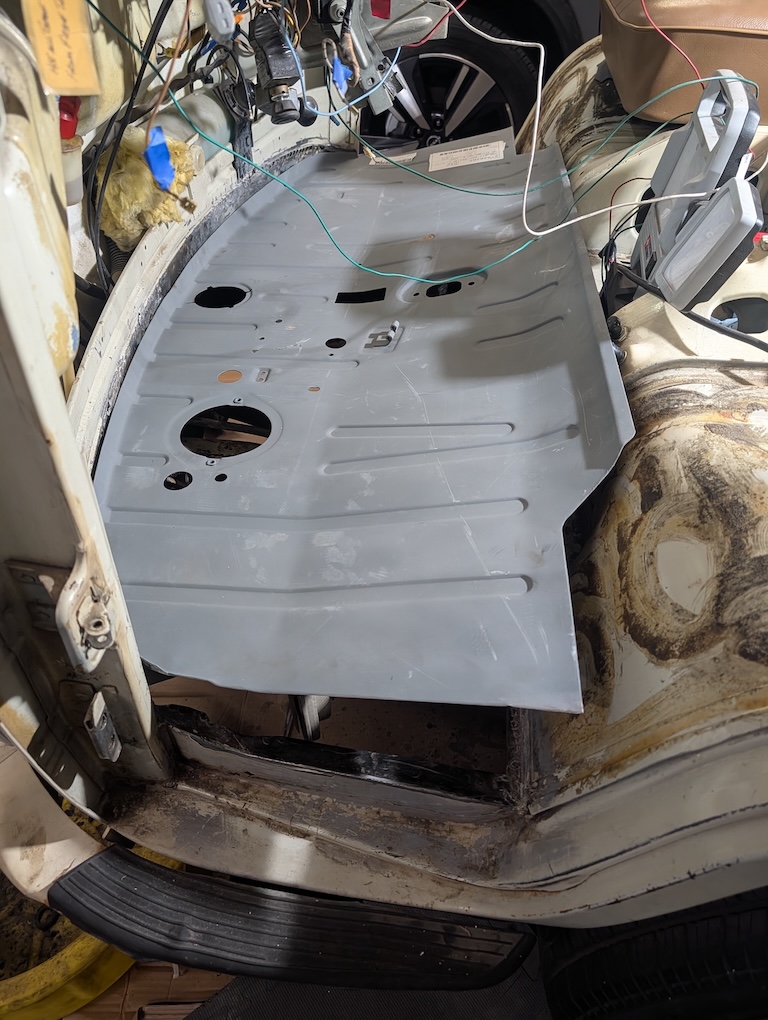
I was so excited to finally give this floor pan a go. I pulled the pedals, shifter, steering column, and emergency brake (parking brake for the Europeans). My wife and I attempted to put the new floor in and quickly realized something was off. We ended up removing the mounting bracket for the parking brake lever to give us a bit more room.
It is not a drop-in part.
At first, we thought we got the wrong part. The shape was right, the holes were right, but the pan just seemed way too big. I called CIP1 the next day and asked them what other buyers were saying. They told me they only had 1 return since 2016 and that I had in fact ordered the right part. How could that be? This thing seemed too big. The panel in the front and back were floating too high and the floor physically couldn’t fit in the van.
That’s when the mental spiral starts:
Did I need to cut it? Is the bus bent? Did I do more damage than I realized tearing out the old floor
Spoiler Alert: none of those were the real problem.
Cutting the Panel (Maybe)
I measured the new panel from front to back (I think it was ~24") and then measured the front to back of the VW (inner valance to metal right below the seat). That was ~23.5". So I was 1/2" off. I searched and searched and searched. I even asked AI for some help and all signs led me to believe I was going to need to start trimming. We discovered that the back lip also looked slightly “off” and after measuring it was about 3/8" longer between the 2 sides. We made the call to trim about 1/4" to try and even out the rear lip. We knew we didn’t want to cut too much but needed to start making some small adjustments. We cut, we angle grinded, we attempted to fit, and we repeated that over and over and over.
What we learned
- The trim in the back helped.
- We needed to cut small, vertical relief cuts in the A pillar (that piece that comes down from the roof where the door meets the frame
- We needed to cut small pieces off the doglegs (that place you step when getting out of the van) and shape them.
Rinse and Repeat
We tried over and over. Small trimming and shapping, mostly using the angle grinder with my grinding wheel and flap disc. Trim a little, attempt to fit the panel, repeat. What we found was no matter what we did, the front of the pan didn’t seem to want to sit in cleanly with the inner valance. Out last ditch effort was to cut some vertical reliefs on the front lip, especially where it rubbed. We also went along the inner valance (where we took the floor off originally) and ground down the spot welds as flush as possible. We were doing everything we could to spare a millimeter or 3 to help with a better fit.
The Temptation to Force It (Don’t)
At multiple points, it felt like:
“If I just push harder, it’ll go.”
This is the most dangerous moment in a job like this.
If a panel:
- Needs force to sit
- Feels like it might not come back out
- Puts visible pressure on surrounding structure
…it does not fit yet.
Forcing it would have:
- Preloaded the inner valance
- Locked stress into the body
- Guaranteed future cracks or alignment issues
So I stopped pushing and started thinking. I actually gave up for the night, relaxed, and lost sleep thinking about what else I could do. Had I met my match with this project?
That pause probably saved the job.
The Breakthrough: Shape Before Edges
Here’s the thing that changed everything.
About halfway back on the floor pan, there’s a horizontal bend that runs across the width of the panel. It’s subtle, but it controls the entire geometry of the floor.
On this CIP1 panel, that bend was:
- Too soft
- Not pronounced enough
- Functionally too flat
Looking back, I probably should have recognized this after the numerous YouTube videos I watched where the floor pans all seemed to have a more pronounced “curve” to them.
Because of the previous issues, the panel behaved like a spring:
- The front edge rode up
- The rear edge pulled backward
- Everything looked too long even when measurements said otherwise
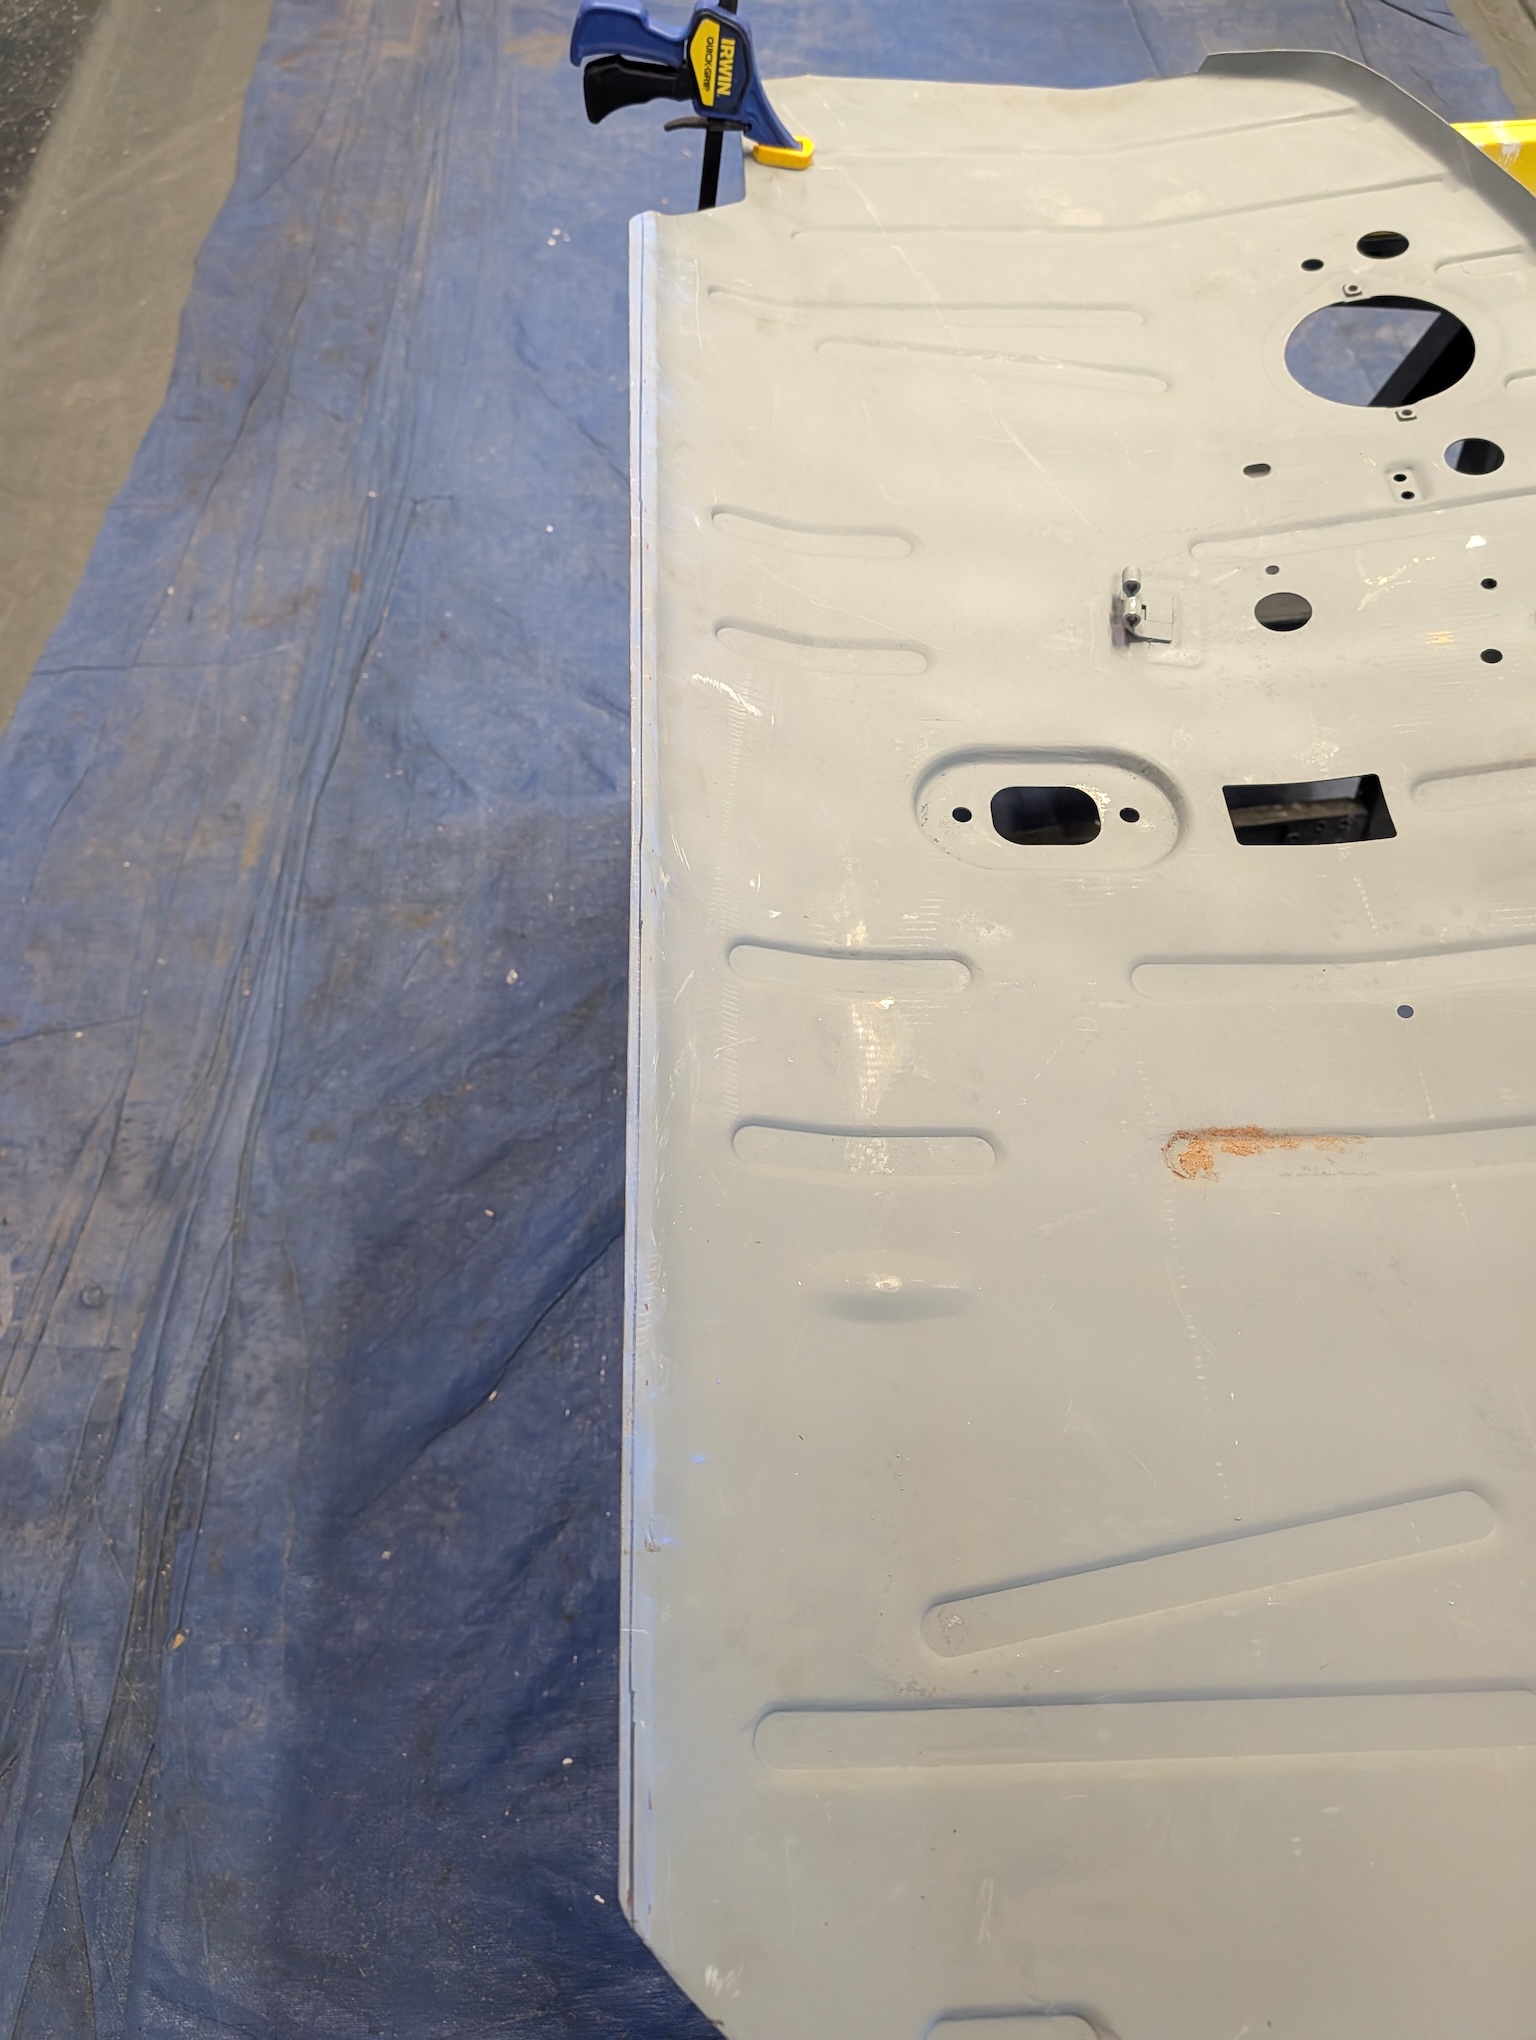
I took the floor out, laid it on a table, clamped it really good, and re-shaped that bend using controlled body weight, slowly and evenly. With the pan flipped upside down, we put the edge of the table right where that bend is. And I walked back and forth pushing down with equal pressure. Nothing violent. No hammering. Just carefully reintroducing the shape the panel should have had from the factory.
And suddenly:
- The panel dropped instead of skating
- The front edge sat lower
- The whole thing stopped fighting me
This was the turning point. But what we learned is the cuts we made on the rear probably weren’t necessary (however, there was still enough of a lip to sit cleanly).
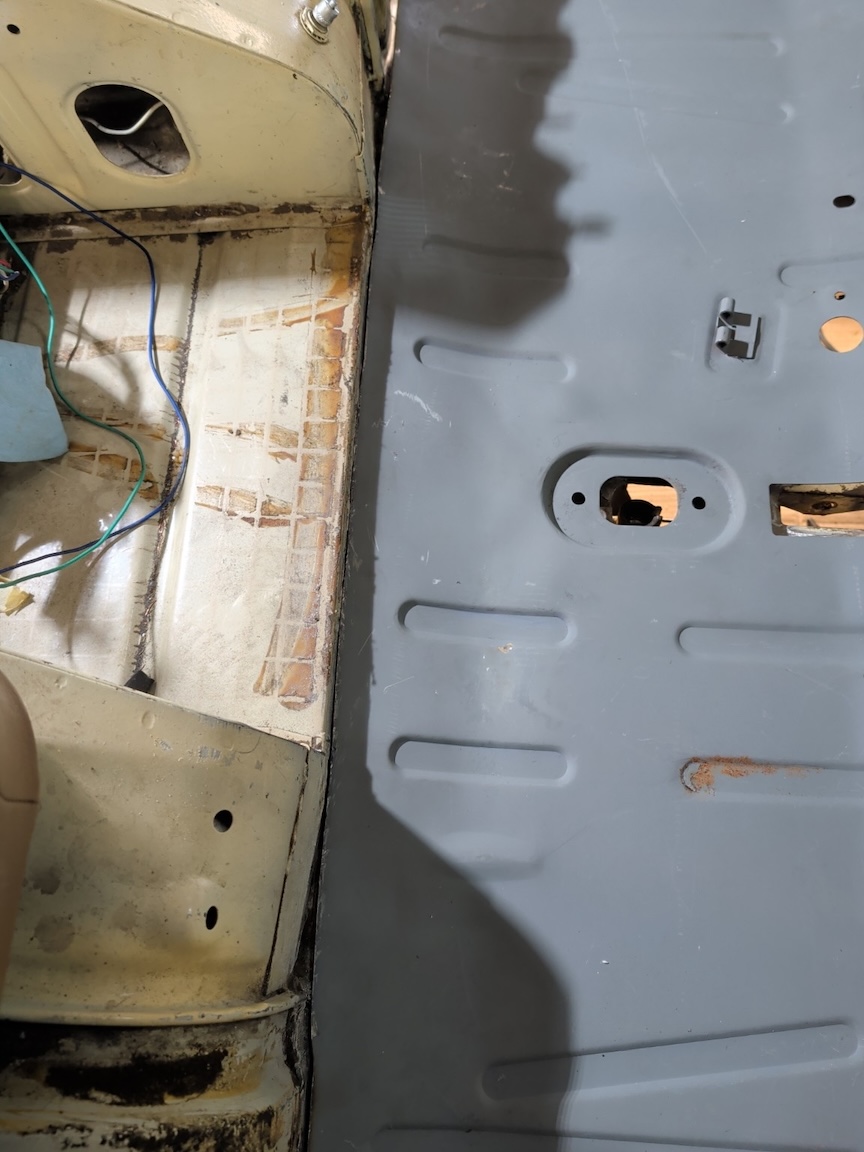
The Inner Valance Reality
Because the original floor was removed with drills, chisels, and pry bars, the inner valance wasn’t perfect anymore.
It had:
- Raised spot-weld nuggets
- Minor burrs
- Slight waviness
Before cutting more metal off the new panel, we:
- Ground the old spot welds flush
- Lightly dressed the flange flat
- Did not try to move or reshape the valance
That last part matters.
The bus sets the geometry.
The floor adapts to the bus — not the other way around.
Vertical Relief Cuts (Yes, Really)
Even after fixing the bend, the front vertical face of the floor was still very stiff, and the valance had a slight crown.
The solution wasn’t force — it was relief.
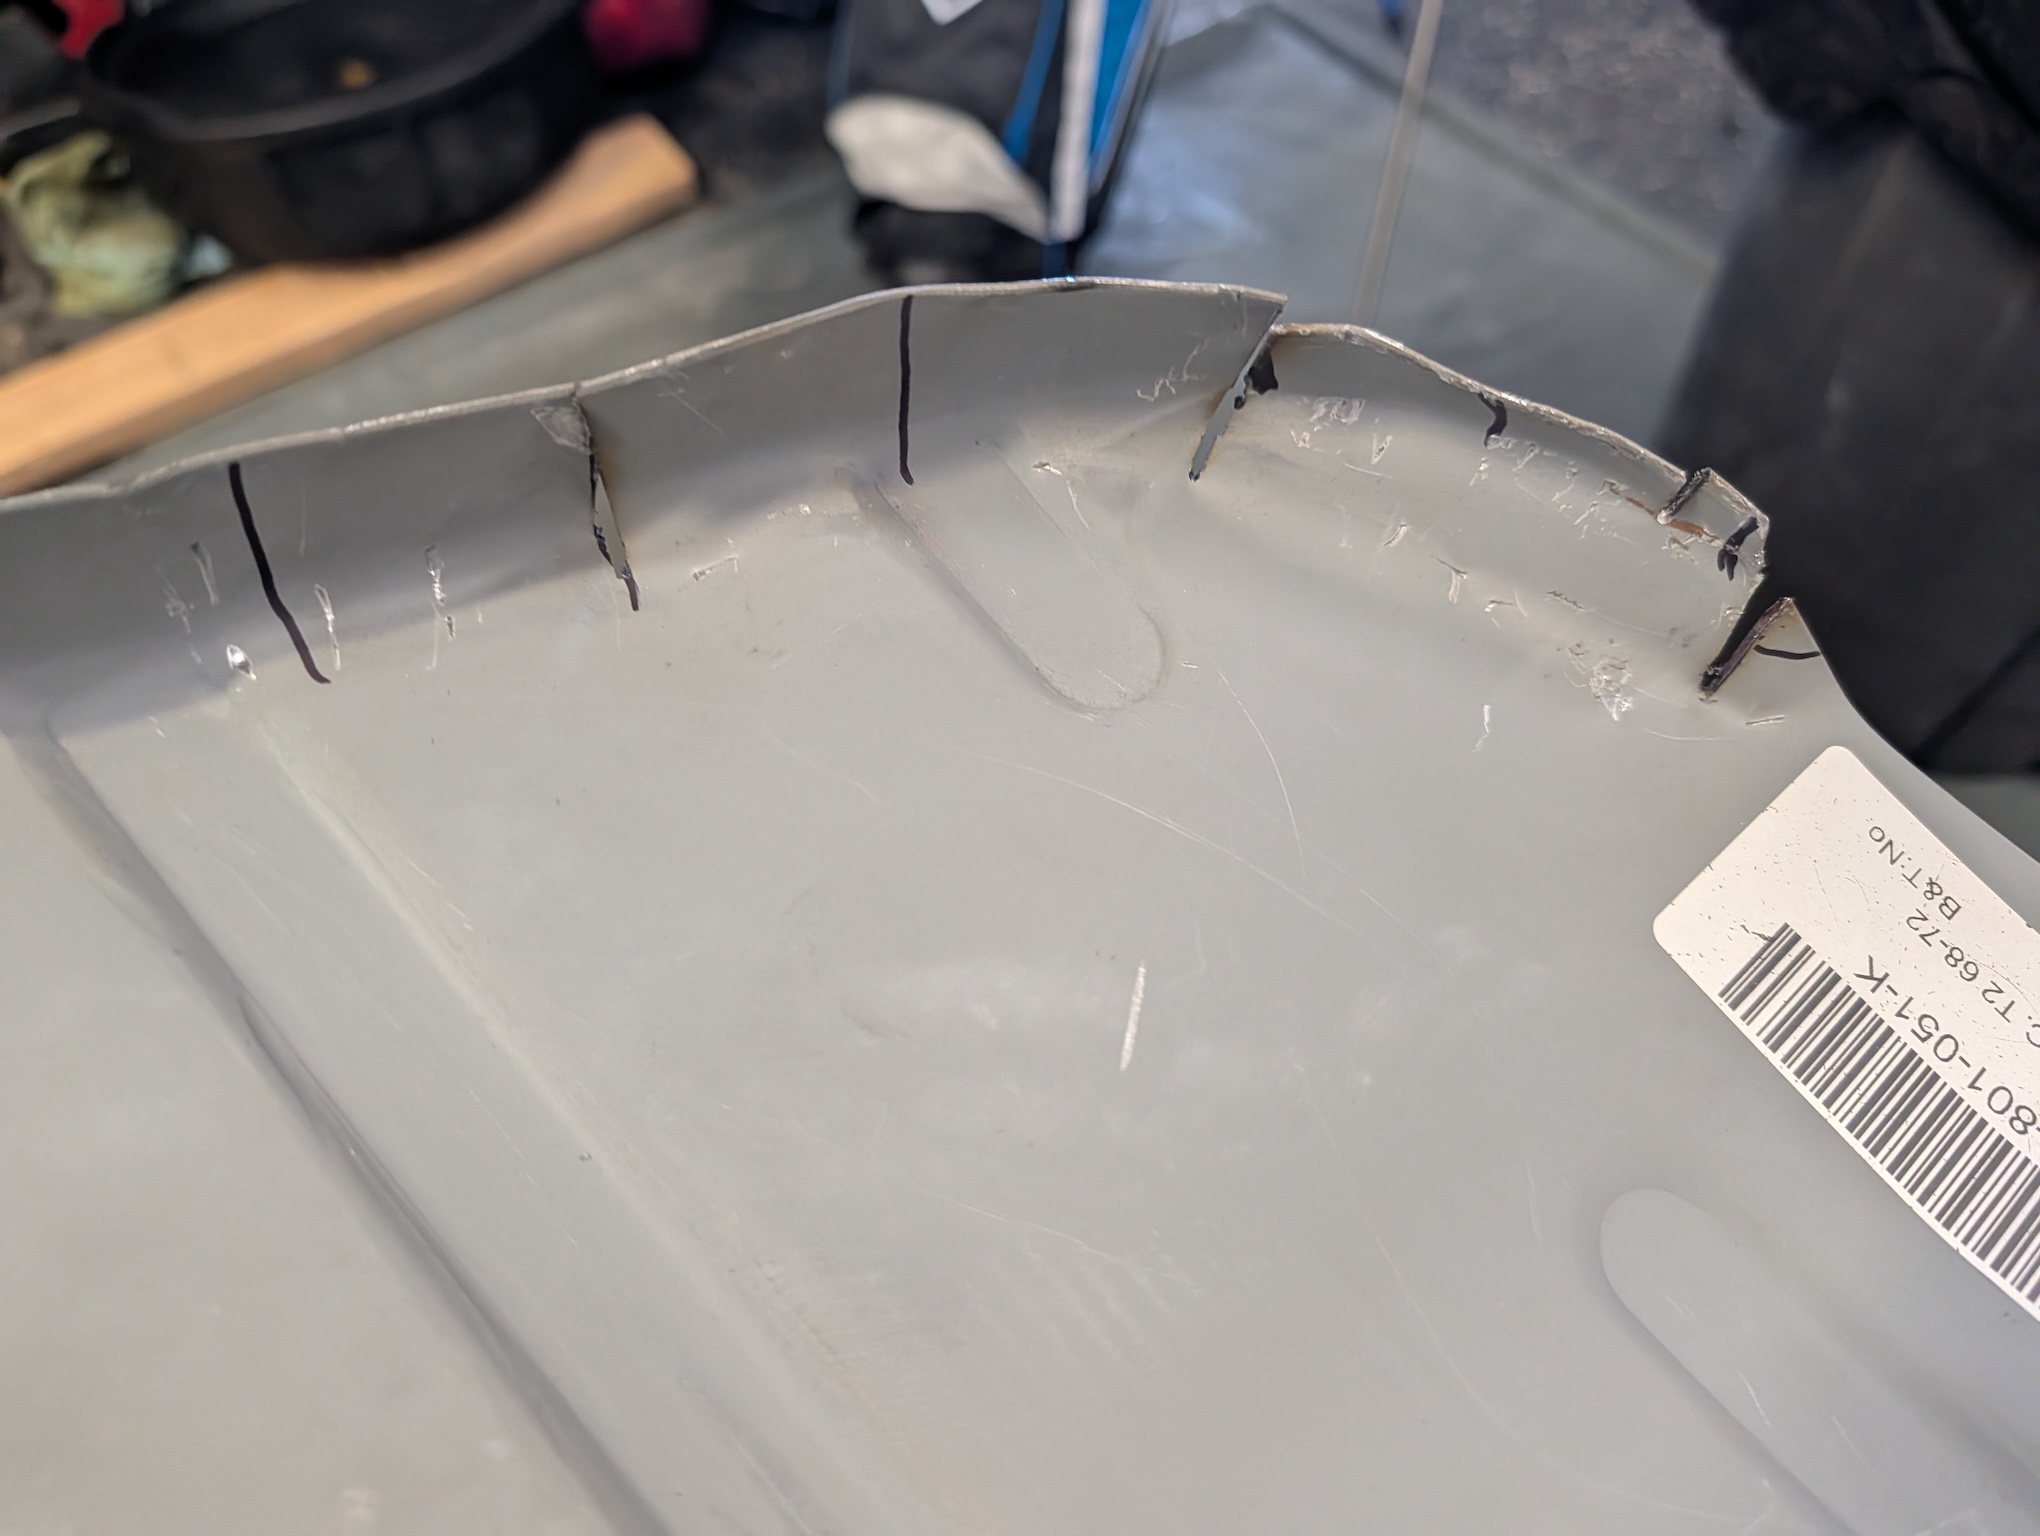
I added a 4 short vertical relief cuts in the vertical face of the floor panel. These were *in addition to the 2 relief cuts we already did in the A pillar area early on. They were:
- Not full height
- Not into the flat floor
- Just enough to let the metal relax and follow the valance. We knew we could hammer the vertical lip against the valance later and the cuts were thin enough they’d be easy to weld back together.
Once those cuts were in:
- The panel could move forward the last few millimeters
- The floor dropped instead of riding up
- The shifter suddenly made sense. The bolt holes were still slightly off but we knew we could widen the holes slightly and that’d be enough to make them fit.
I thought to myself, is this what metal fabricating is all about? I’m not sure I’ll ever know. What I do know is that taking small, methodical steps helped get a better fitment and not ruin a $400 floor pan.
The Rear Edge Panic (That Wasn’t a Problem)
After trimming, the rear overlap was down to about 1/8 inch.
That felt wrong.
But in reality:
- The factory seam there wasn’t generous
- It relied on spot welds, not a big flange
- Tight isn’t bad. Forcing it is bad
In the event I don’t have enough of the floor pan catching the original seam, I can use a thin backing strip.
Final Thoughts on the CIP1 Floor Pan
The good
- Affordable
- Structurally solid
- Can fit very well when shaped correctly
The reality
- The bends are soft, especially the really important one that stretches horizontally across the pan
- The panel is stiff where it shouldn’t be
- It requires shaping, trimming, and patience
Our big takeaway
Fix the shape before you keep trimming the edges.
If You’re Doing This Job Yourself
Here’s the advice I wish I had at the start:
- Test-fit constantly
- Remove stress before removing metal
- Never force a panel into place
- Trust your instincts when something feels wrong
- Take breaks — clarity usually follows
This job is absolutely doable as a DIY project but it rewards patience far more than confidence.
If you’re in the middle of this repair and questioning everything — you’re probably closer than you think. I know I was.